Make Your Own Patterned Paper and Turn it into 8 Cards

I recently took a sheet of 8.5×11 cardstock and stamped all over it to create my own patterned paper. Then I thought it would be fun to see how many cards I could make using my new patterned paper. Here’s the paper I made.

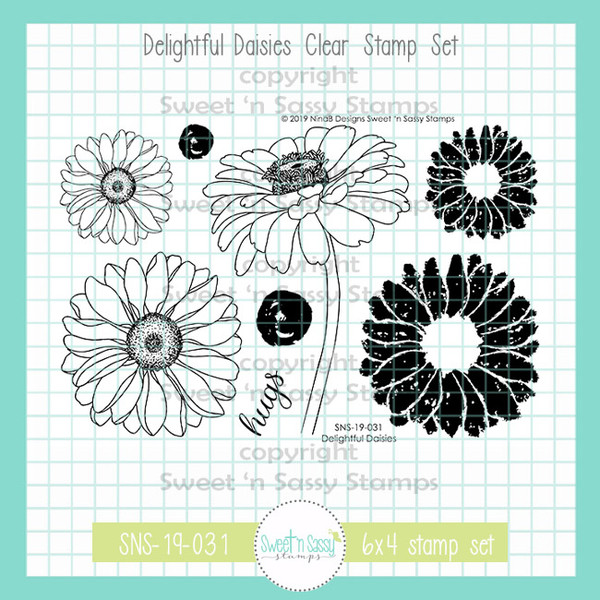
To make my patterned paper, I used Distress Oxide inks in Candied Apple, Carved Pumpkin, Fossilized Amber, and Gathered Twigs on a light butter yellow colored cardstock. I used the Delightful Daisies Stamp set from Sweet n Sassy Stamps.

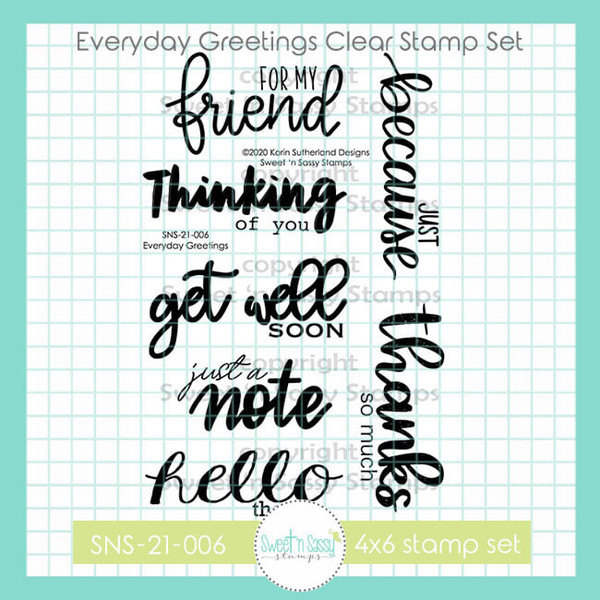
I used the Everyday Greetings from Sweet N Sassy Stamps for the sentiments.

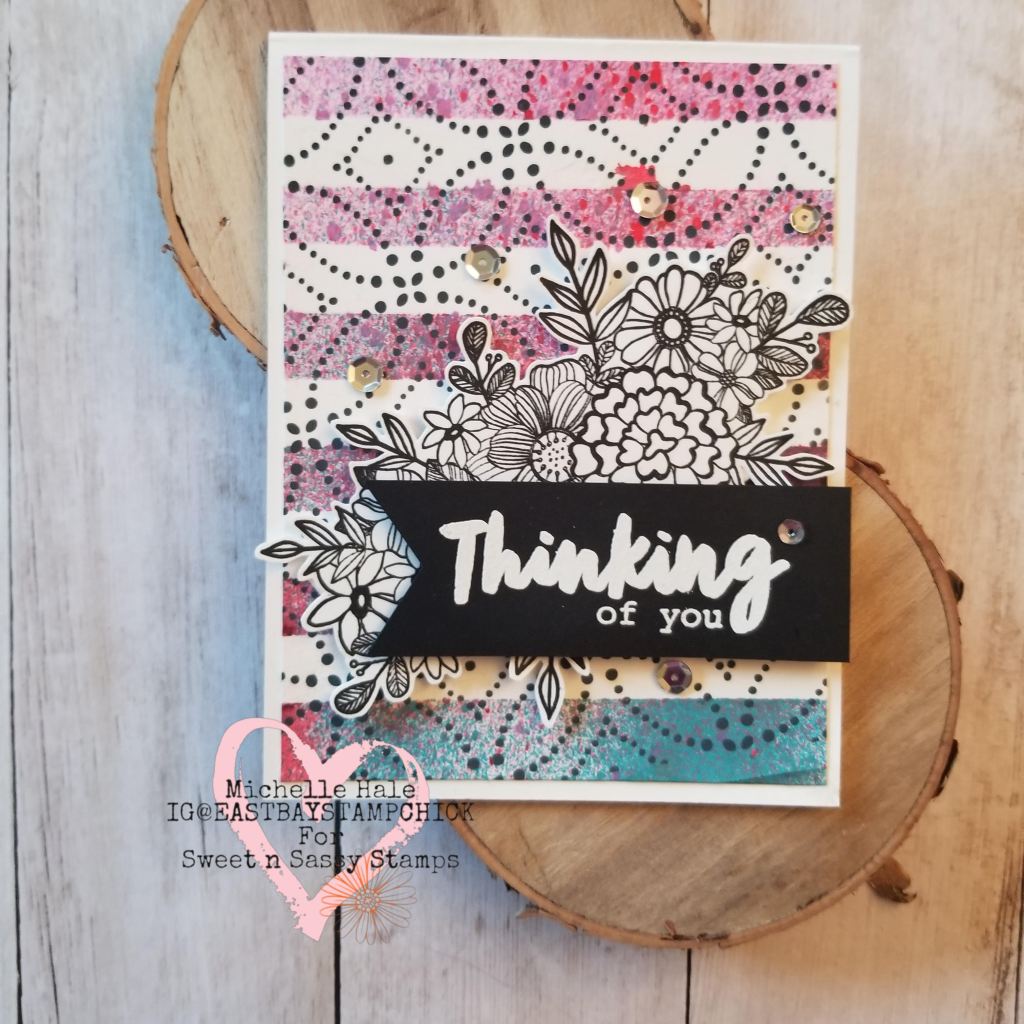
Here are the cards I made.

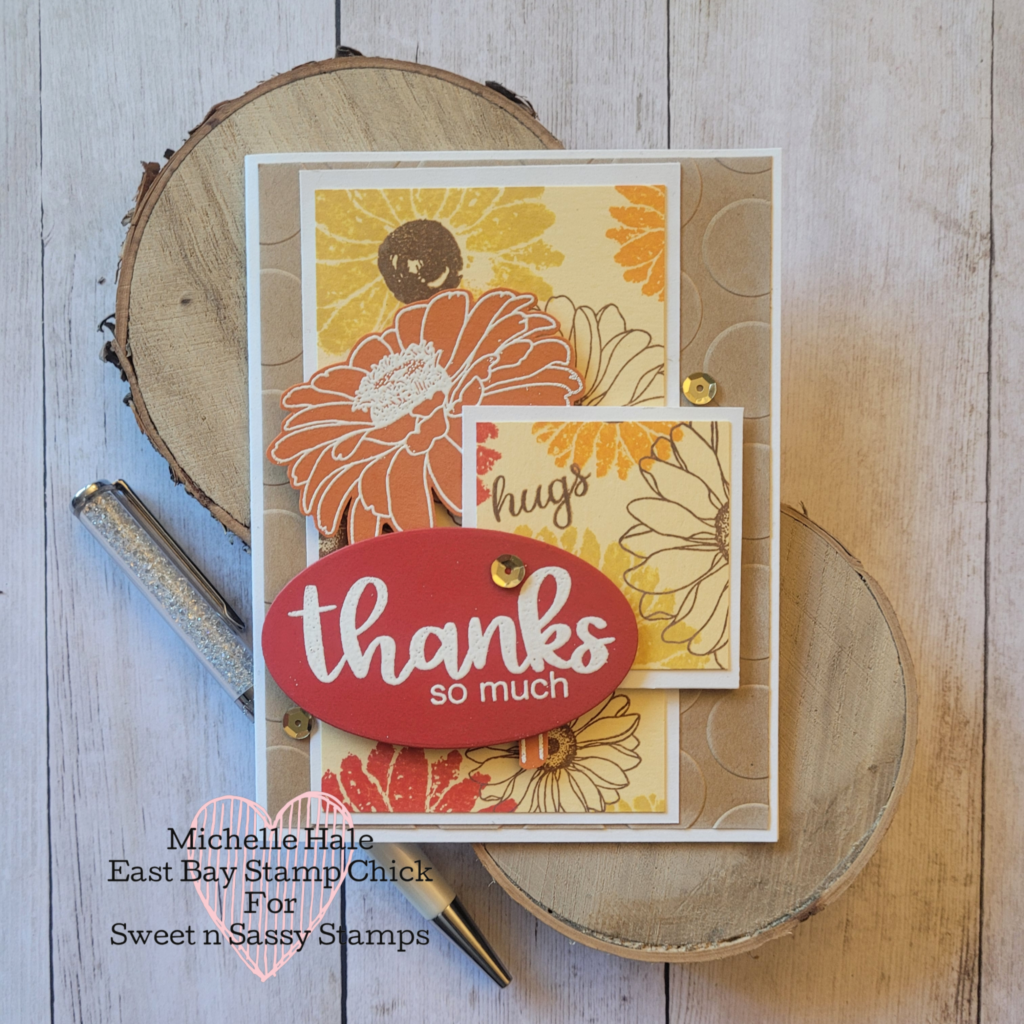
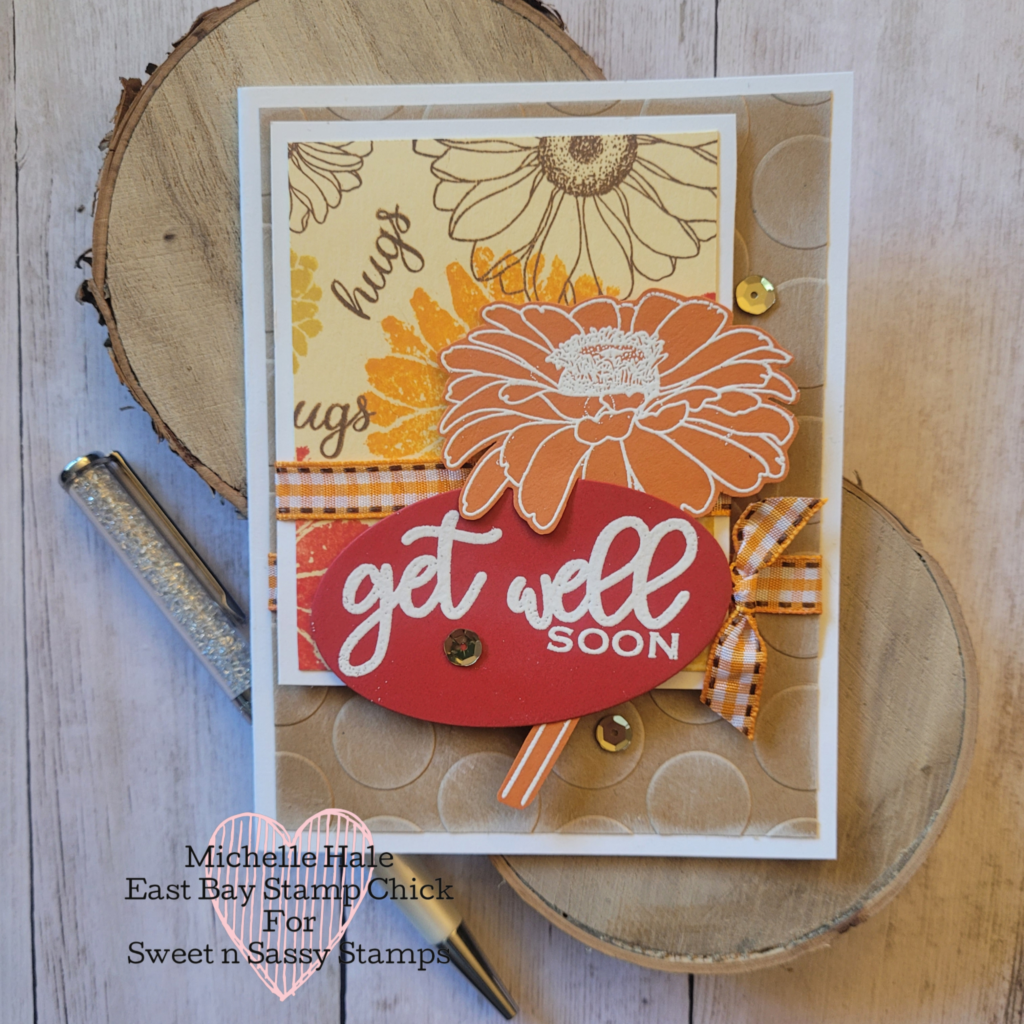
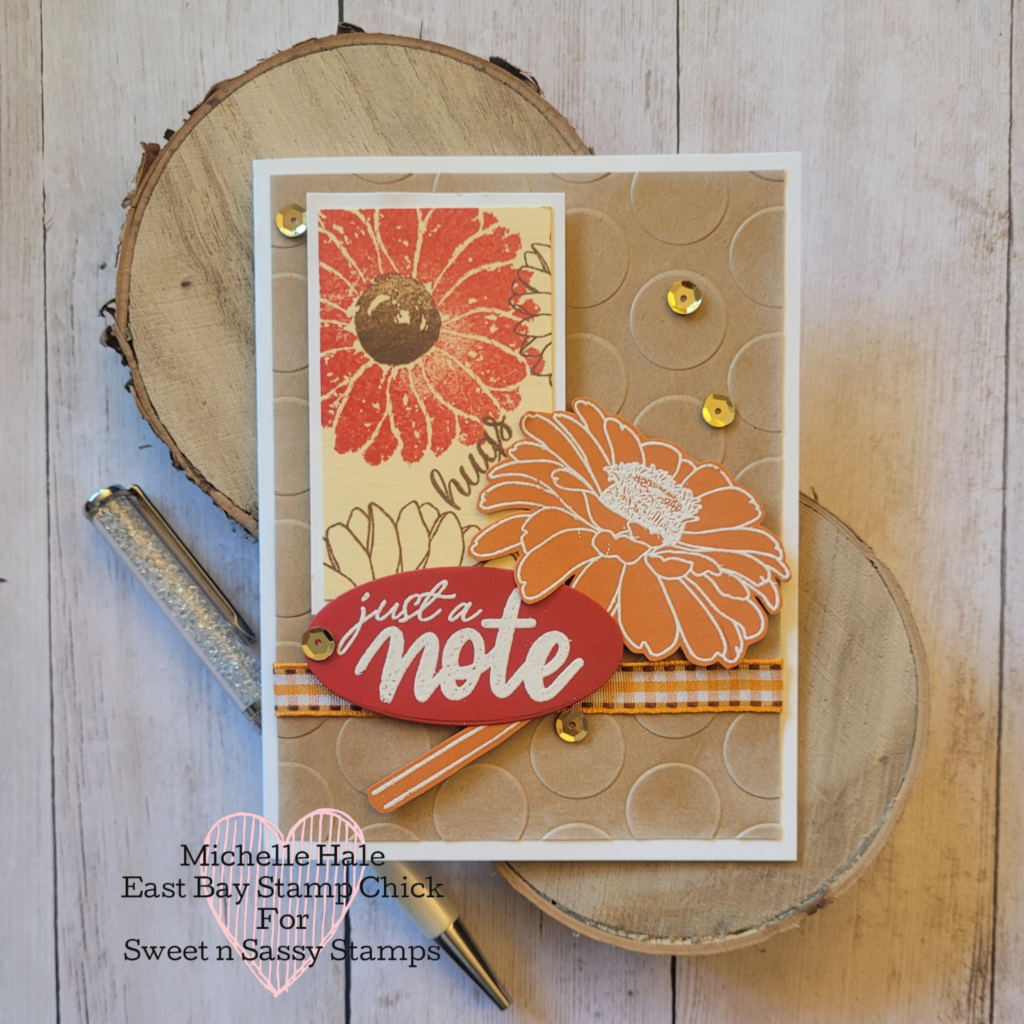
To make the cards I cut the sheet of patterned paper up. I will show you what cuts I made below. I die cut 8 ovals for sentiments and I heat embossed the sentiments in white. I also cut 8 card panels out of kraft paper measuring 4×5.25 inches. I embossed all the kraft card panels with an embossing folder of large dots. I sponged a little white pigment ink on top of the embossed panels to bring out the definition. Once I cut up the patterned paper I cut a border panel for each piece of white cardstock. Each piece was a quarter of an inch bigger than the patterned piece. To help embellish the cards I heat embossed in white 8 of the daisies with the stem out of orange cardstock and fussy cut them out. Lastly I added ribbon and sequins.

Here is how I cut my patterned paper.

These cards were lots of fun to make! And now I have a set of 8 cards to give as a gift to someone!

If you give this a try please tag me on social media. You can find me on Instagram and Facebook as East Bay Stamp Chick. And if you enjoyed this blog post please leave me a comment and subscribe.

April Sweet ‘n Sassy Stamps Release Blog Hop

It’s that time of month again! Sweet ‘n Sassy Stamps has a new release! Here is my card to celebrate all the fun, new items!

May be an image of one or more people and text that says 'Sweet n Sassy stamps April Release BlogHop! COMMENT FOR A CHANCE TO WIN! Leave comment on each stop on he hop for a chance to win $25 gift code to the shop! sweetnsassystamps.blogspot.com'

Welcome to the Sweet ‘n Sassy April Release Hop. Hop along with us as we share our projects with the fabulous April release! Don’t forget to leave a little comment love for the designers linked below for a chance to be entered into our giveaway drawing for a $25 gift voucher to the Sweet ‘n Sassy Stamps shop. Winner will be announced on the SNSS blog, Wednesday, April 28.

I used the new Butterfly Background stamp set with the Count Your Rainbows Stamp and Die Bundle.

To make this card, stamp the Butterfly Background stamp with Versamark ink. Then heat set with a white embossing powder. Once cooled, ink blend with Distress oxide ink in Blueprint Sketch, Salty ocean, and Tumbled Glass. Then i stamped the rainbow, sun and clouds. I colored the rainbow with alcohol markers. Die cut the images and adhere the images with foam squares. I finished by adding a few sequins for a little bling.

Here’s the list of designers for the blog hop. Check out each one and leave a comment to be entered to win!

Sweet ‘n Sassy Blog

Sheri Gilson

Michelle Hale (you are here)

Lyn Tomlin

Lieschen Harshbarger

Lee Ann Barrett

Karen Decknick

Julee Tilman

Jane Bosi

Esther Asbury

Diane Zechman

Charmaine Canham

Ceal Pritchett

Happy Crafting!

Sweet n Sassy Stamps March Release Blog Hop

Welcome to the Sweet ‘n Sassy March Release Hop. Hop along with us as we share our projects with the fabulous March release! Don’t forget to leave a little comment love for the designers linked below for a chance to be entered into our giveaway drawing for a $25 gift voucher to the Sweet ‘n Sassy Stamps shop. Winner will be announced on the SNSS blog, Wednesday, March 24.

I’m so excited for this month’s release! Here is my card featuring new Everyday Greetings Stamp set, the Consider the Wildflowers set and the Delightfully Delicate Stencil.

For this card I used my gelpress and low tack tape to create the striped background. Then I ink blended black ink over it using the Delightfully Delicate Stencil. I fussy cut the floral image from Consider the Wildflowers set. Then I heat embossed in white the sentiment from the Everyday Greetings set on black cardstock. I’m really happy with how this card turned out. Here are the 3 items I used.

Everyday Greetings Clear Stamp Set

Thank you for visiting. Enter your email to subscribe to my blog to get crafty inspiration! Don’t forget to check out each blog and leave a comment to be entered to win! Happy Crafting!

Here’s your blog hop list of designers.

Sweet ‘n Sassy Blog

Julee Tilman

Ceal Pritchett

Diane Zechman

Esther Asbury

Jane Bosi

Karen Decknick

Lee Ann Barrett

Lieschen Harshbarger

Lyn Tomlin

Michelle Hale (you are here)

Sheri Gilson

Coffee Loving Cardmakers + Sweet ‘n Sassy Stamps Collaboration Hop

Image may contain: text

Welcome to the Coffee Loving Cardmakers + Sweet ‘n Sassy Stamps Collaboration Blog Hop! We’re so excited to be teaming up with the Coffee Loving Cardmakers design team to bring you some fabulous caffeinated inspiration…. and a PRIZE! Leave a little comment love at each stop as you hop about for a chance to win a $25 gift code to the Sweet ‘n Sassy Stamps shop.

I’m so excited to be apart of the hop! Here is my card.

This is a gatefold card but with a twist. The big coffee cup is popped up and hold the side gates in place. It unfolds showing several panels.

Folded the card measures 4×5.5 inches and will fit in an A2 size envelope. To make this card you need a piece of cardstock that is 11×5.5 inches. On the 11 inch side score on the following marks 1.75, 3.5, 5.25, 5.75, 7.5, 9.25. I cut panels for each section a quarter of an inch smaller than the one before so they nest inside of each other. The large coffee cup is from the Sweet N Sassy Stamps I Like Big Cups stamp set. I fussy cut the cup out then layered the cup with stamps from the Delightfully Delicate Background stamp and the Typewriter Text Background stamp.

The sentiment on the cup is from the Fill Me Up Clear set and the Love Wordfetti set. I only used a “you are” from the Love Wordfetti set to complete my sentiment.

I think this a fun “guy coffee card”! Thank you so much for visiting me today!

If you’ve been hopping along, you just left Jane’s blog. To start from the beginning head over to the Sweet ‘n Sassy Stamps Blog. After you’re done here, your next stop will be Esther’s blog. If anything goes amiss, you can always head to the Coffee Loving Cardmakers blog for the complete hop list.

And don’t forget to leave a comment on each stop on the hop and get crafty!

If you love seeing crafty inspiration subscribe here.

Sweet n Sassy Stamp December Release Blog Hop

Welcome to the Sweet ‘n Sassy Stamps December Release Hop. Hop along with us as we share our projects with the fabulous December release! Don’t forget to leave a little comment love for the designers linked below for a chance to be entered into our giveaway drawing for a $25 gift voucher to the Sweet ‘n Sassy Stamps shop. Winner will be announced on the SNSS blog, Wednesday, December 23.

Before I give you the list of where to hop let me show you the card I created for the hop!

Do you know anyone who needs a little encouragement? I think we all do. 2020 has been a different and a tough year for most. So I made a card that I can give to remind someone that God loves them more than they can imagine or know.

This card is pretty easy to make. The back ground XO paper is from a Valentine’s paper pad in my stash. I created the main panel by using the same Love stamp over and over. It’s from the Much Love Stamp set, which is also the stamp set of the month. It’s free with a $75 purchase for December

Once I added all the stamping in a pale pink, I stamped over the top in black my main sentiment, Love You More. I then added the dash with a black marker and added the God after it using the Marker Alpha set.

Lastly the heart came from the Forever and Always stamp set.

Ok, so now you’ve seen my latest card, here is the list of where to hop. Don’t for get to leave a comment on each blog to be eligible to win the $25 prize!

Sweet n Sassy Blog

Julee Tilman

Ceal Pritchett

Diane Zechman

Esther Asbury

Jane Bosi

Karen Decknick

Lee Ann Barrett

Lyn Tomlin

Michelle Hale (you are here)

Sheri Gilson

Thank you so much for visiting me! If you don’t want to miss out on seeing all the crafty fun please subscribe.

November Sweet n Sassy Stamps Blog Hop

Hey There!

I’m super excited to be apart of the Sweet n Sassy November Release Blog Hop.

Welcome to the Sweet n Sassy Stamps November Release Hop! We’re celebrating 13 years of Sweet n Sassy Stamps this month! Hop along with us as we celebrate and share our projects with the fabulous November release with you! Don’t forget to leave a little comment love for the designers linked below for a chance to be entered into our giveaway drawing for a $25 gift voucher to the Sweet n Sassy Stamps shop. Winner will be announced on the SNSS blog, Wednesday, November 25th.

Before I give you the list of designers to hop to let me show you my latest card.

I used the new Make a Wish Stamp Set for those adorable cupcakes and the sentiment. I used the Texture Tiles 4 to create the plaid inside each cupcake’s frosting.

Here’s your chance to hop along with us and be entered to win! And don’t forget to leave a comment at each stop! Thank you for stopping by!


Sweet ‘n Sassy Blog


Julee Tilman


Ceal Pritchett

Diane Zechman
Esther Asbury

Jane Bosi
Karen Decknick

Lee Ann Barrett
Lyn Tomli
Michelle Hale (you are here)

Sheri Gilson

If you like seeing crafty fun posts please subscribe down below and you will get an email when I post a new project.

Easy Envelope Journals

Hi Crafty Friends!

I have been having so much fun making envelope journals. I had never made these before and had no idea how easy they are and how much fun! I posted one on social media and was asked several times for a tutorial. So I have a Youtube video for you on the process. All the stamped images on these journals are from Sweet n Sassy Stamps. Below is an affiliate link that will take you to their site and will provide me with a small commission.

Click the Sweet n Sassy logo to go to their site.
Watch my YouTube tutorial on how to make the journals and see the inside of each journal.

If you want to create along with me, you will need 6 envelopes and 6 matching card bases.

Thank you so much for visiting. If you like getting crafty inspiration please subscribe to my blog.

Sweet n Sassy Stamps April Launch

HI Crafty Friends!

I’m so excited, I am a guest designer for Sweet n Sassy Stamps for April 2020! I had the chance to play with 2 brand new stamp sets before their launch. So today I will show you one of the cards I made.

I think it came out so cute! I used the new Country Garden Stamp set, the existing Fur-ever Friends stamp set and the Tea for Two set, both illustrated by Jennifer Nilsson. Here are the sets.

To make the card I used water color paper and did a quick background using my Jane Davenport water color paints. I colored the all the images with Spectrum Noir Alcohol Ink Markers and popped them up on foam squares. I did fussy cut the cute bunny to layer behind the wheel barrow. I used printed paper from my stash and a scallop rectangle die from my stash. I added blue and pink sequins to finish.

Thank you for stopping by my blog. Don’t forget to subscribe so you can see lots of crafty inspiration.

Also if you want to check out Sweet n Sassy Stamps, click on the logo below. The link is an affiliate link that will provide a small commission to me.

Valentine’s Day Cards with Sweet n Sassy Stamps

HI Crafty Friends! I made 2 cards with a couple of what I call people builder stamp sets from Sweet n Sassy Stamps. I will show you the guy card 1st since I think making cards for guys is the hardest!

For this card I used some red paper from my stash then layered a piece of kraft cardstock that I had stamped sentiments from the Love Wordfetti Stamp Set. Instead of using each sentiment on its own, I leave them all together and stamp them all at once. I can then use it as a background like I did here or cut them into sentiment strips to use on lots of cards. The “guy” is from the Brotherly Love Stamp Set. It has lots of choices to you can “build your person”. I choose the glasses and longer goatee so it would resemble my husband. I added in the main sentiment and hearts from the Forever and Always Stamp Set. I used a few different reds and a deep brown inks to stamp the hearts in. I also inked the edges of all the kraft cardstock. I think it’s so fun that you can combine lot of different features to make your person!

Now for the girl card. Have you ever heard of “Galentine’s”? I hadn’t till last year. But I think it’s a great idea to make cards for all the great girl friends in your life. So here is my Galentine’s Day card.

I used the Girl Power Stamp Set to build my girl. She actually kinda looks like me instead of one of my friends. There is also a Girl Power 2 Stamp Set, so there are tons of options for hair, accessories and clothes! This card has lots of pink and is soft and feminine. I love it! I used the flowers from the Happy Day Stamp set and stamped them in a soft pink and sage green inks from my stash. I also splattered some pinks and black inks in the background. The Happy and Day sentiment words are from the Happy Day Stamp Set also. To make the Galentines, I used the Mini Grunge Type Alpha, so I could spell out Galentine’s. The heart is from the Forever and Always Stamp Set. The ribbon and sequins are from my stash. Below are the stamp images.

Thank you for stopping by! If you are interested in checking out any of these stamp sets click on the Sweet n Sassy image below and it will take you to the site using my affiliate link. By using my affiliate link I will receive a small commission at no extra cost to you. And if you love seeing crafty inspiration hit the subscribe button! And leave me a comment, I’d love to hear from you!

Genuine Love Faithdex Card

Hello Crafty Friends

Recently I participated in a Faithdex card swap. These swaps are so fun because I sent in 10 cards and I will get back 10 cards from all across the United States. I’m excited to get the cards and see what everyone else has created! Here is the card I created for the swap.

I think the cards turned out super cute! To make the cards I use a Heidi Swapp memory dex die that I purchased from Amazon. I die cut out 2 cards, one from kraft cardstock for the back and one in printed paper. The paper I chose for the front has the subtle word script across it. I then inked the edges with a sponge and Hazelnut Ink from Fun Stampers Journey and glued the 2 sides together. I used stamps from Sweet n Sassy Stamps for the front. I stamped the front of the card with stamps from 4 different sets. The wood slice is from The Wood Backgrounds stamp set. The peonies are from the Peony Cluster stamp set. The peonies are embossed with Flashy Flamingo embossing powder from Glitters Galore (use to be called Sparkle n Sprinkle). This embossing powder has lots of sparkle because of all the glitter mixed with the powder. The sentiment is from the Genuine Love stamp stet and the heart from the Forever and Always stamp set. Lastly, I added some twine and a sequin to finish the card.

What makes this a Faithdex card instead of a Memory-dex card is the scripture on the back. Since everyone will be receiving their cards in February, I thought a love/ Valentines theme would be nice. So I picked a scripture that shows what true, genuine love is. That’s how God loves us. Human love can’t compare to how He loves us. I am constantly amazed at how He loves us. the God of the whole universe cares about all of us. That is a mind blowing thought!

If you want to check out any of the stamp sets I used, click on the Sweet n Sassy Stamps graphic below. This will take you to the web site using my affiliate link. By using my link I will receive a small commission at no additional cost to you. This commission will help to maintain my blog so I can continue to bring you crafty inspiration.

Thank you for visiting! If you like seeing fun projects, then please subscribe to this blog so you can receive all the fun stuff right in your email!